Slimline Safari Card
August 25, 2020
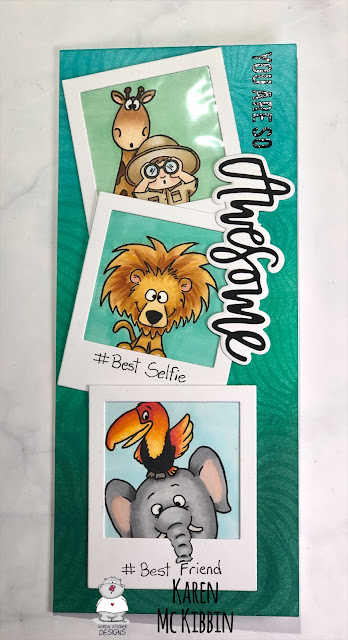
Hello, it’s Karen here again! I’ve got a slimline card today that could be used as either a thank you card or an encouragement card for a friend, or even a birthday card. I’ve used stamps from the
Go Wild set, as well as the lion from the
Party Animals set.
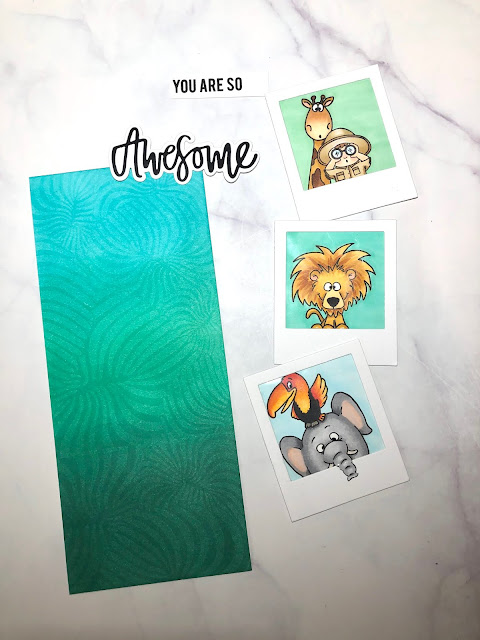
I started by stamping The Leafy Bold Print stamp from Hero Arts onto my card front with Versamark ink. Once the ink was dry, I ink blended over it with original Distress Inks in Pine Needles, Lucky Clover and Peacock Feathers. I have to admit that I loved this card base so much that I made another card with the same background and added some flowers for a quick thank you card.
Next, I stamped out my images by masking as needed and allowing room between my images to cut them out with a square die (I used the Selfie Square die from My Favourite Things). I used copic markers to colour them in, and also for the backgrounds. I die cut 3 Polaroid frames from white cardstock using the Polaroid Shaker Frame die from My Favourite Things. I wanted my images to look glossy like a photograph, so on the back of these frames, I placed double sided adhesive around the opening, and then adhered some scrap acetate (from a stamp set packaging), trimming it down to fit the opening. Then I used a little glue to attach my coloured images to the acetate on the back of the Polaroid frames. Just for fun, I fussy cut around the elephant’s trunk and made that come out over the front of the Polaroid frame (I had to cut a small slit in the acetate to allow it to come out). Finally, I hand wrote the hashtags messages on the front since I didn’t have any stamps for this, so you can get creative with what you write or personalize it for a special person.
I die cut the sentiment from an older Neat and Tangled stamp and die set called “Awesome”. The die set comes with a border die so I cut that from white cardstock, and the word from black cardstock. I stamped the “You are so” in black Versfine ink and clear embossed the sentiment at the top of the card, and then glued the die cut “Awesome” in place. I placed the sentiment going down the side of the card as it allowed me to more easily fit my images without obscuring them too much. This was a fairly quick and easy card to do and the slimline size gives you so much more room to play with. Thanks so much for stopping by and I hope you’re having a great day!
Leave a comment
Comments will be approved before showing up.