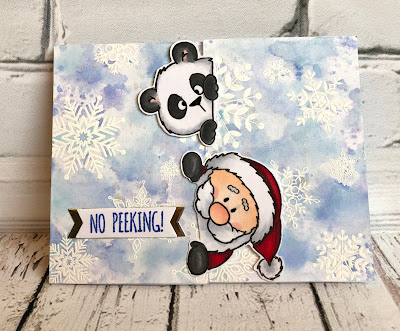
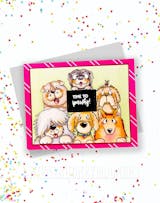
"No Peeking" Panda Christmas card
November 22, 2019
Hello everyone, it’s Karen again from @Karens_Kardzz and I’ve got a
“No Peeking Panda” Christmas card to share with you today that has a fun
inside surprise element.
If you would like to see a video of how I made this card,
you can see it in HD HERE.
I started this card by cutting a card front that is 4 1/4” x 5 1/2” from white cardstock. The base is 4 1/4” x 11”.
I
started working on the card front first so it would have time to dry. I
white heat embossed a selection of snowflakes all over the front. I
used the snowflakes from Simon Says Stamp “Lots of Snowflakes” set, but
you could use whatever you have. Then I ink smooshed the card front with
Distress Oxide inks in the colours Tumbled Glass, Shaded Lilac, and
Blueprint Sketch. Once I had this looking the way I wanted it to, I
spritzed the front with Tsukineko shimmer spray in Sparkle. I set this
aside to dry.
|
Front of the card with snowflakes |
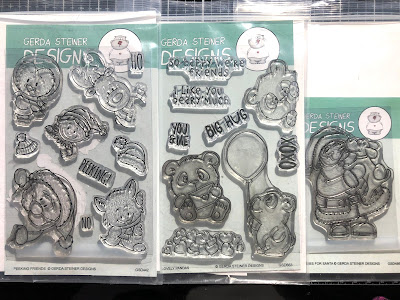
I took my images from three Gerda Steiner stamp sets - Lovely Pandas, Peeking Friends, and Puppy Kisses for Santa.
I used all the pandas, but for the one holding the balloon, I used a
baby wipe to remove any ink from the balloon or string. I wanted him to
look like he was standing by Santa, waiting for his turn to give Santa a
hug! I coloured all these images with copic markers and I have listed
the markers I used down below.
Since I don’t have the
dies, I fussy cut out my images. For the Peeking panda and Santa that go
on the card front, I didn’t want the copic markers to show through to
the inside when you open the card. To get a matching cut, I used
temporary tape to adhere another piece of cardstock to the back of my
coloured image, and then cut through both pieces of cardstock together.
|
Cutting through two layers of cardstock |
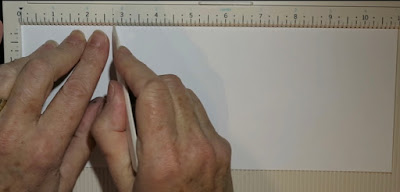
I creased the card base at 2 3/4” in from both ends and then used a bone folder to really crease the folds.
|
Crease card base at 2 3/4" from both ends |
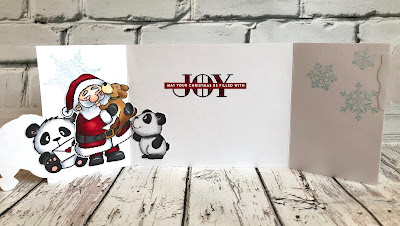
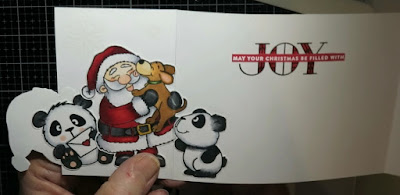
On
the inside, I placed the word “Joy” from the Simon Says Stamp set
“Stained Glass Greetings” and stamped this in Versafine black ink. I
coloured this in with a red Tombow marker so it wouldn’t bleed through
to the back. I used a red copic marker and coloured a scrap strip of
cardstock. I stamped this with Versamark ink and white heat embossed the
sentiment -“May your Christmas be filled with”. I trimmed this down
and adhered it across the word Joy with double sided tape.
I
stamped a few more snowflakes on the inside front panels in Tumbled
Glass Distress Oxide ink and then sprinkled them with some Hero Arts
Sparkle embossing powder and heat set them.
Then I cut
my snowflake card front in half at 2 3/4”. After making sure I had these
with the snowflakes lined up the way they were stamped, I adhered these
to the front folds of my card base. I placed 1/8” double sided tape
along the coloured peeking panda’s paws and placed him on the card front
near the top. I glued the matching blank back piece and adhered it to
the back of the panda so he was white when you open the card. I did the
same with the peeking Santa, placing tape just on his mittens.
|
Adhering the back of the peeking Santa |
On
the inside, I placed my images where I wanted them to be and glued them
down into place. I was careful to keep the standing panda to the
right of the front fold. The Santa with the puppy was just slightly on
the fold and I had to work to make sure he was creased very well, using a
bone folder and pinching the crease. I found I had to keep working at
this crease, but it eventually works out.
|
Showing the crease line with images attached |
For
the sentiment on the front of the card, I stamped the “No Peeking” from
the Peeking Friends stamp set in Blueprint Sketch Distress Oxide ink
onto white cardstock. I had a die in my stash that I used to partially
die cut the ends into fishtails, but you could easily do this with
scissors if you don’t have a die. I also cut one slightly longer out of
silver foil cardstock and adhered these together. I then used double
sided tape to adhere my sentiment to the card front.
I
love that this card is still 4 1/4” x 5 1/2” and fits into a regular A2
sized envelope, yet it has such a fun surprise inside and lots of room
to write a message. I hope you’ll give it a try!
Copic markers used:
Santa: E000, E00, R20, R39, R25, R35, YR23, N6, N4, N2, C2, C0
Dog: E35, E53, E51, R20, G99, G94, G82, YR23
Pandas: N6, N4, N2, N0, R20, C2, C0
Leave a comment
Comments will be approved before showing up.