DIY How To Make An Envelope + A Bonus Card
December 05, 2016
Hello everyone!
I'm Diana from
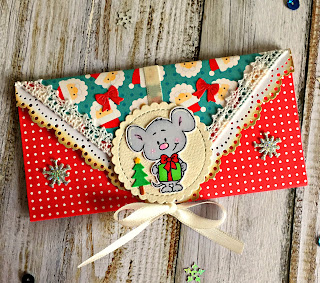
Moments of Creativity and this is my last post as a guest designer for this fabulous team. This is why I decided to greet you all with a funny wintry project which might come in handy for the upcoming holiday season. Today I would like to show you how to make a cute envelope from just one piece of paper. Plus you can fold one in less than 5 minutes, so it's a great last-minute way to make your present special. Still don't believe me? Then let's start from the very beginning:)
I guess I was too exited while making my very first envelope that I completely forgot to record the whole process. Yep, that's me For this reason a designer paper which I'm going to use for the below step-by-step tutorial will be different from the one used on the original envelope.
1. Take a double-sided designer paper. You can experiment with paper sizes, but if in doubt, a standard-sized (11x11 inches) will do. Fold the paper in half lengthwise. Match up the edges of the paper to ensure the fold is straight, and press down on the folded edge with your fingers to make a crease. Then, you can unfold the piece of paper, and it will have a crease in the middle:
2. Now it's time to make a second crease. Fold your paper in half from the other side so it again makes a rectangle. Match up the edges and press down on the folded edge to make a crease:
3. You now have two nice creases. Grab the point at the bottom of the paper, and fold it up into a small triangle with the top of the triangle just barely touching the center of 2 creases. Crease well!
4. Fold other 3 corners into the center as well:
5. Fold up this square in half:
6. Once this is done, pull 2 small triangles up:
7. Then put some tape inside the folded square and glue the inside together:
8. It's now time to glue small triangles together. You can first decorate their edges with some punched paper or just leave everything as it is:
Ta-da! Now you have an envelope! Easy, right?
Once the base is ready, you can start decorating the envelope: add some lace, a picture or a ribbon, in short, whatever you like
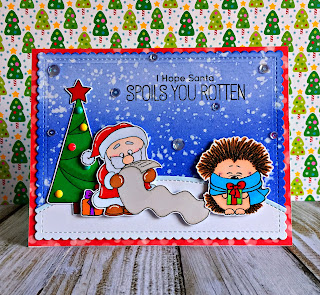
And for those who's been patient enough and survived all these instructions, I have a bonus card to share with you:
Wishing you all the best for the Holiday Season and a prosperous New Year!
Yours, Diana
Leave a comment
Comments will be approved before showing up.