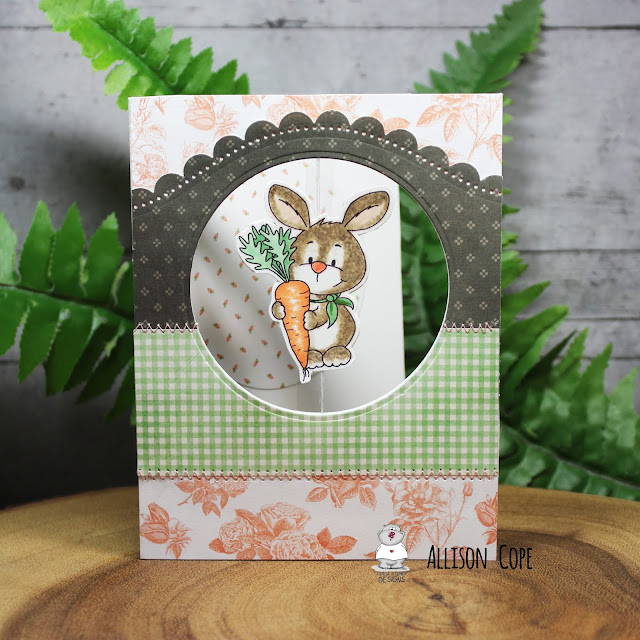
Fun Spinning Bunnies Card by Allison Cope
March 26, 2020
Happy Thursday everyone! I hope you and your family are safe and well. For
today’s card I’m going to create a spinner card.
How to make this spinner card...
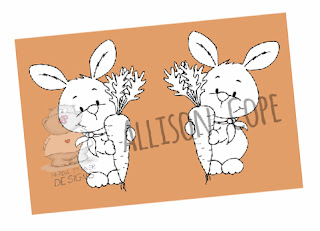
1. I started by printing out the adorable “
Bunny with Carrot” digital stamp. I took the image into my
editing software, sized it to my desired size and then took that image,
duplicated it and flipped it to create a mirror image. I colored them both
up using Copic Markers.
2. I made a side folding card base, 5.5” x 8.5”, scored at 4.25” and
folded it.
3. I created a front panel with die cut patterned papers and stitching.
4. I
temporarily adhered my front panel to my
OPEN card base and took a circle
die on top of the panel & the base together and sent it through my die cutting
machine. The die only cut the front panel and the front of the card base.
5. I then fussy cut out my bunnies and taped a doubled up piece of white
thread on the back of one bunny. Then I adhered the other bunny on the back of the
threaded bunny to created a string and bunny sandwich.
6. Then I stretched the bunny and string across the die cut hole on the card base and taped the
string multiple times down to the card base to secure it tightly.
7. Then I adhered the patterned paper card front over top of the taped bunny
string and card base. The string is now sandwiched between the card base and
patterned paper panel.
To “
load up the string”, you just have to twist the string, hold
the bunny still and then close the card. The tension built up in the string
will cause the bunny to spin once the recipient opens the card!
I hope you get a chance to make a fun spinner card too!
~ Ally ~
stamps: GSD (Bunny with Carrot)
cardstock: Recollections (110# White, 65# White)
patterned papers: Bo Bunny (Pincushion Collection 6x6)
dies: Catherine Pooler (Circles), Spellbinders (Curved
Borders 2)
inks: Copic Markers
other: thread